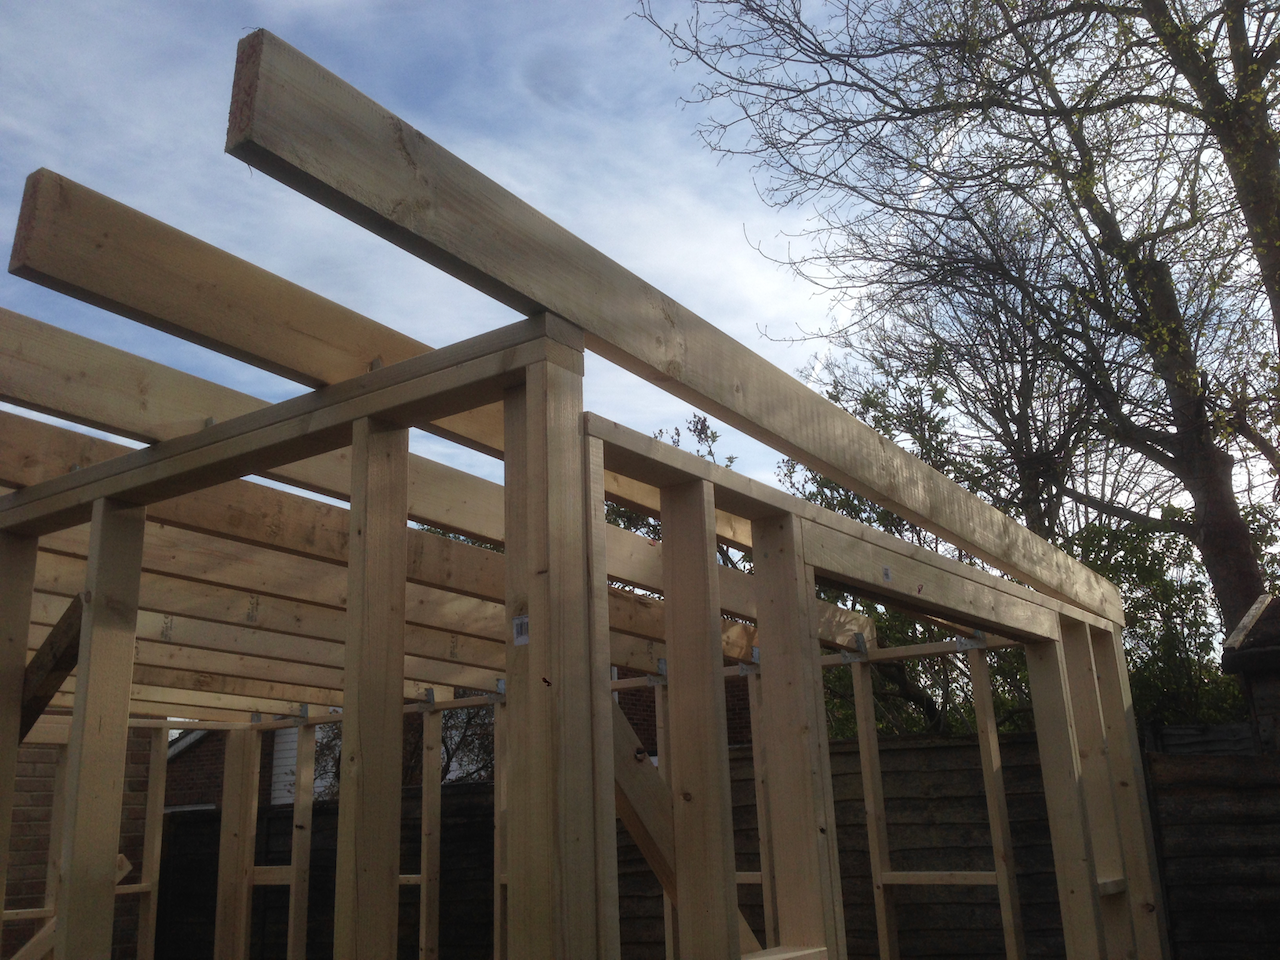
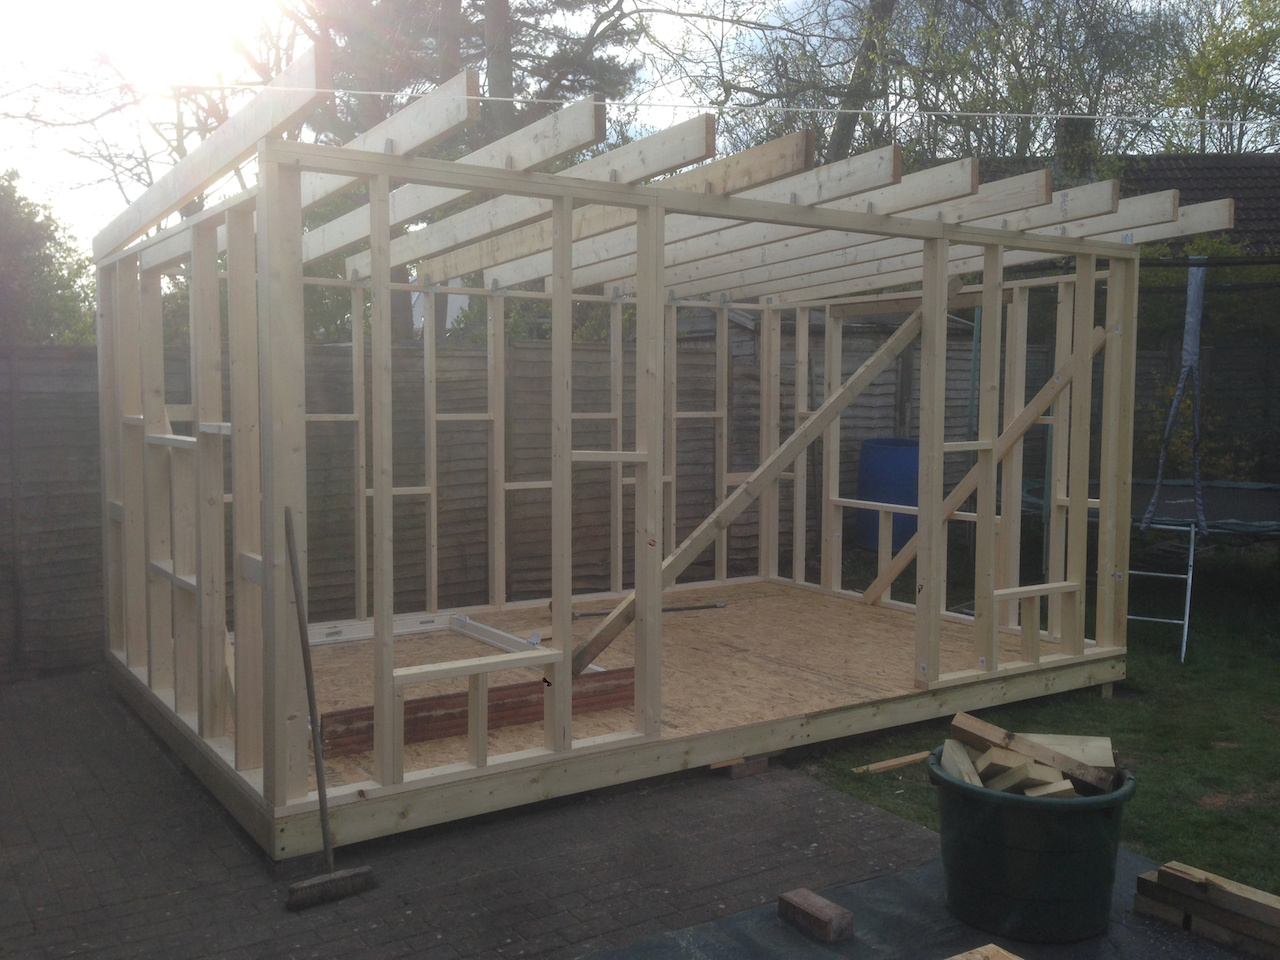
Installing the roof
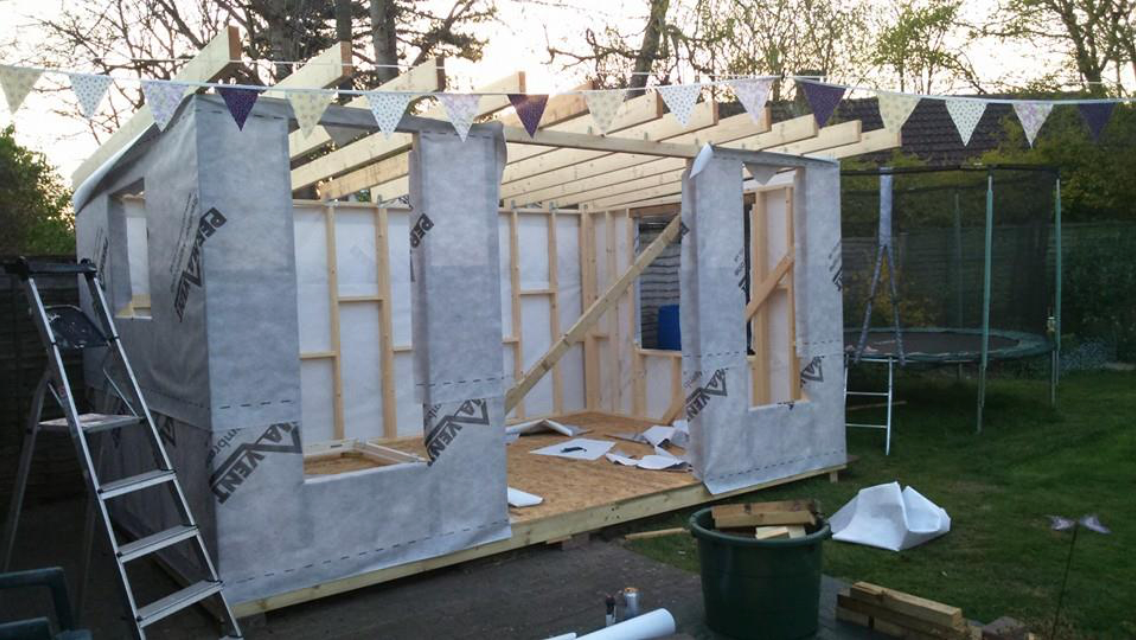
A mono-pitch roof was formed by laying rafters between the front and rear walls. I used this style to keep the overall height at 2.4 metres and avoid the need for planning permission.
Keep a lid on it
Metal brackets were used to secure each rafter to the wall and prevent the entire roof being blown off by strong winds. These brackets also helped position each rafter so they remained square with the rest of the structure.
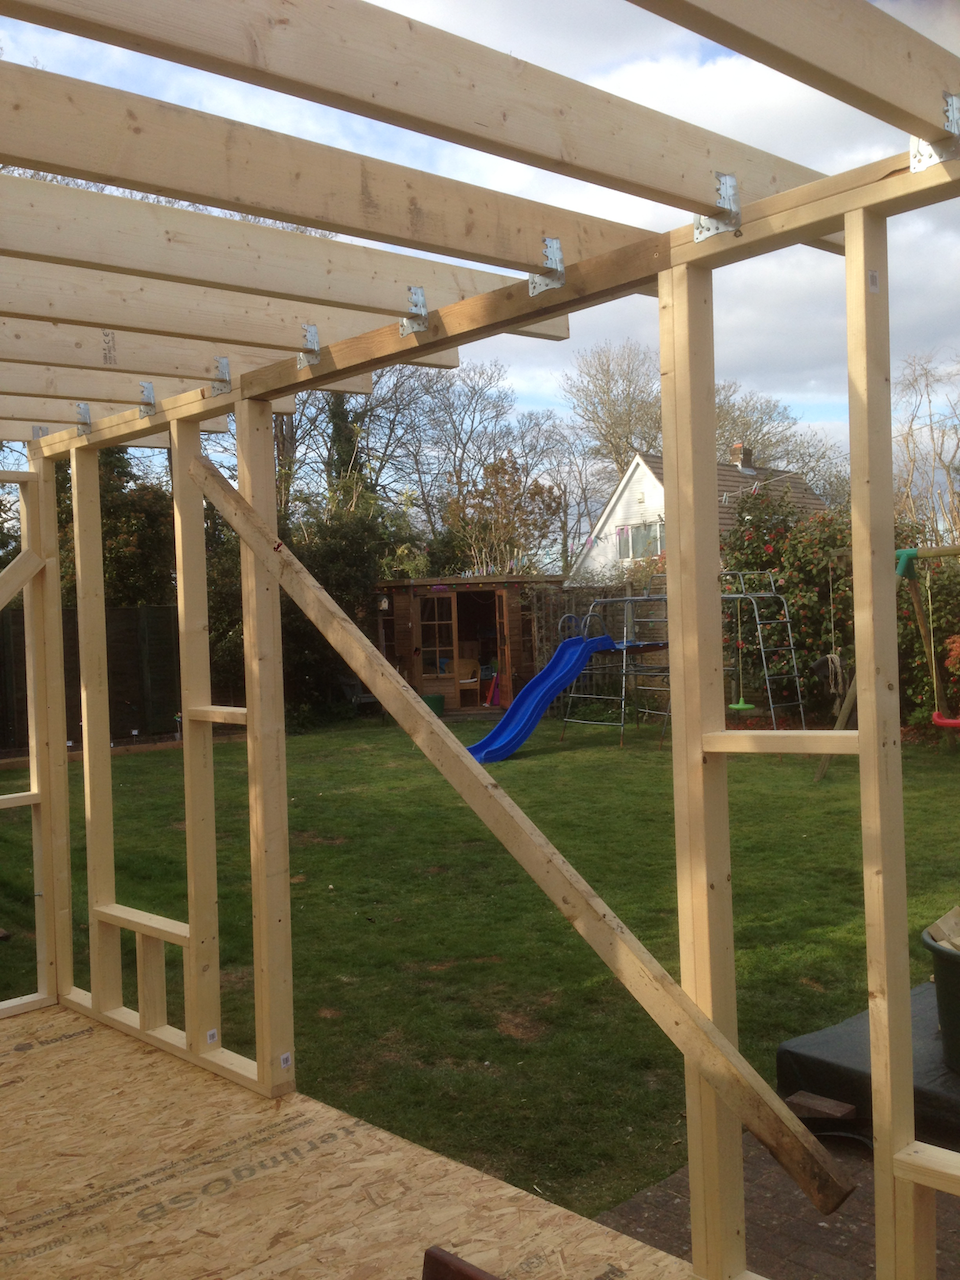
This photo shows the completed timber frame with all rafters fitted:
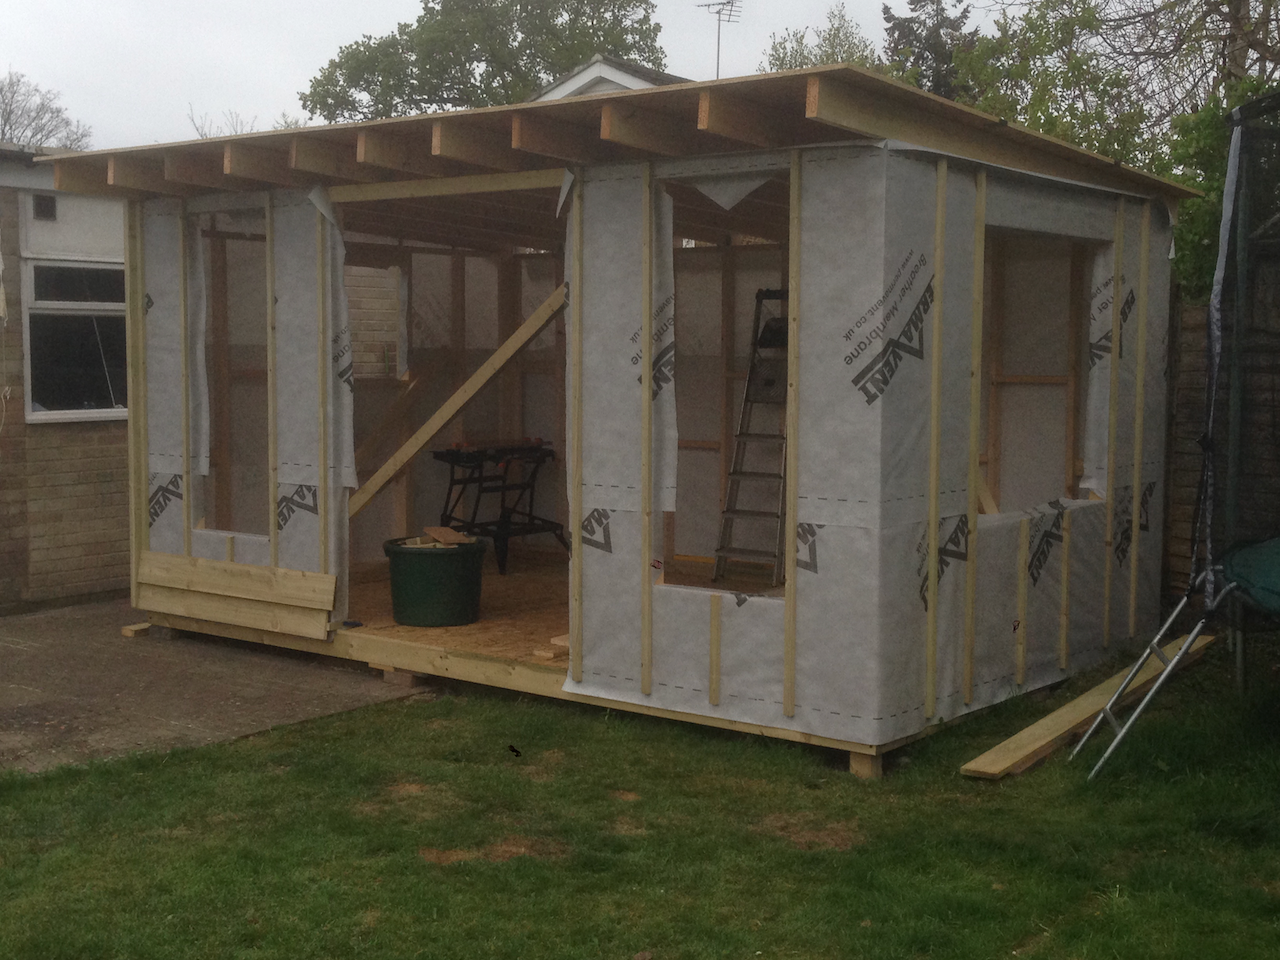
That’s a wrap
I wrapped the walls with a breathable membrane as a first step of weather-proofing. This type of membrane prevents water getting in but allows moisture to escape from the interior.
Finishing the roof
There are a couple of options for finishing a mono-pitch roof. The cheapest option is a timber deck covered with roofing felt. A more robust option is to use rubber membrane - usually referred to as EPDM.
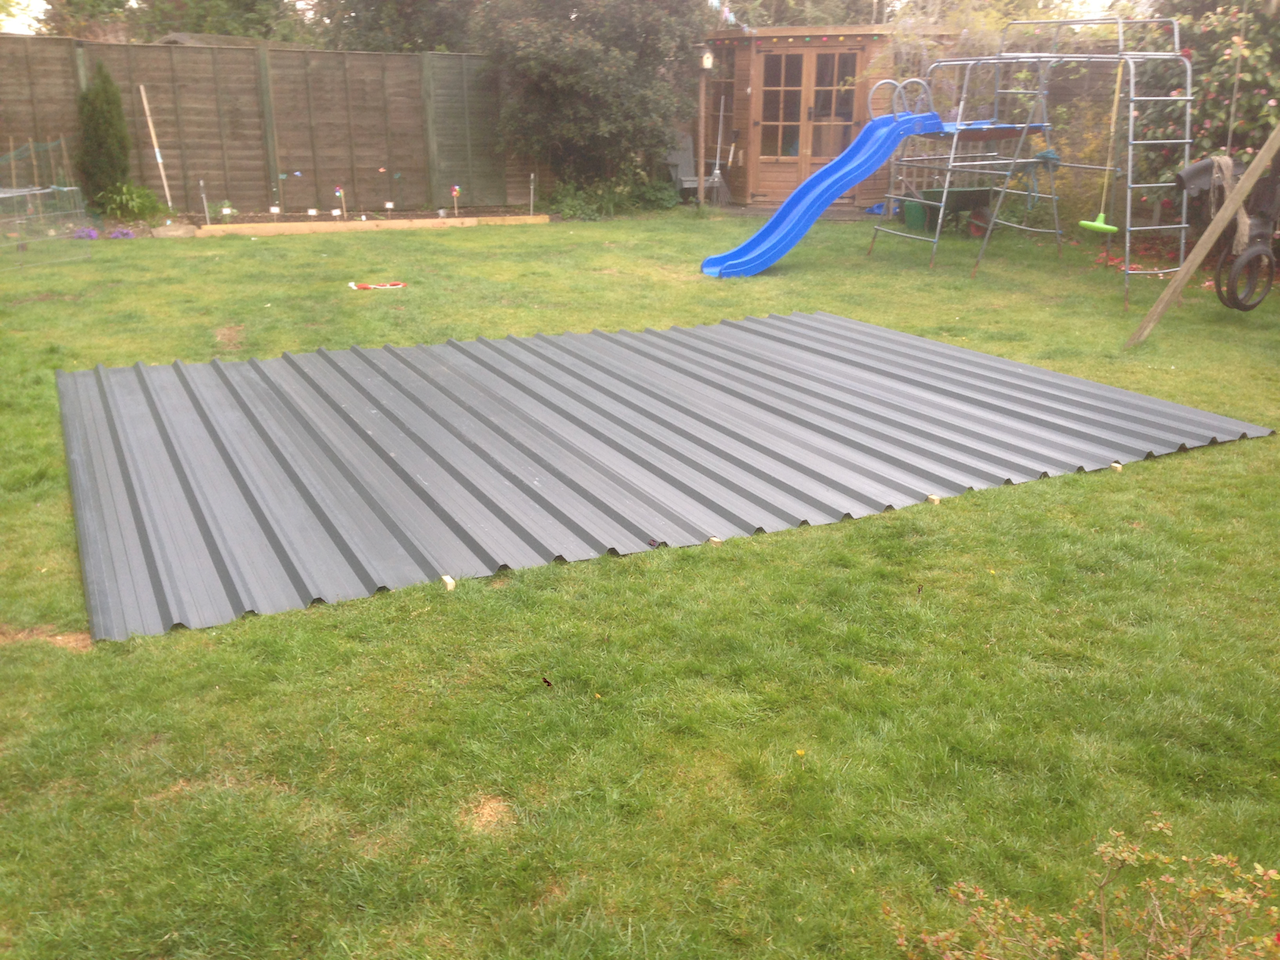
In the end I chose to go with 32/1000 box-profile metal roof sheets for the following reasons
- Zero maintenance once installed
- Can be screwed directly to a timber roof deck
- Available in various lengths; I sourced correct length to avoid any cutting
Here are the panels laid out with the correct overlap to check overall width:
Sheets of OSB were used to create the roof deck. I had designed the roof to use standard sized sheets with no cutting required so this step was straightforward
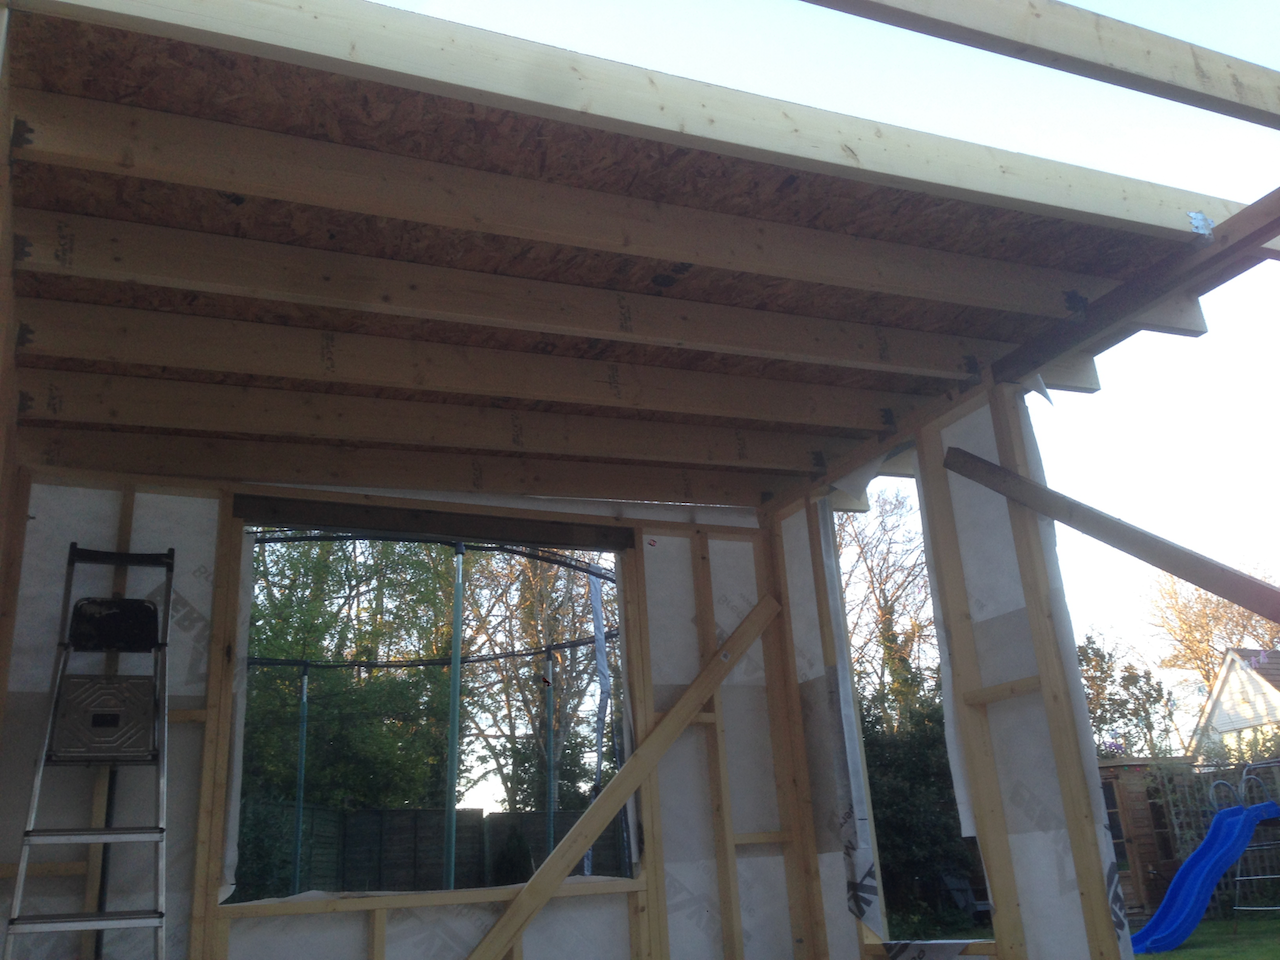
This photo shows the completed roof deck ready for the roof sheets to be installed. These were secured with purpose-designed screw fittings with a washer that creates a waterproof seal.