
My e-drum build with eDRUMin
The previous post explained how drum modules work and questioned if you need a dedicated drum module just to trigger sounds in Superior Drummer 3 (SD3) or other drum software. I decided to go with an ‘e-drum to MIDI’ device and purchased an eDRUMin from Audiofront.
This article goes through the build of my e-drum kit using components from Jobeky, Roland and Yamaha. A full cost breakdown is provided at the end for anyone interested in going down this route as an alternative to complete e-drum kits with a module.
Future posts will give more details on eDRUMin set-up and tweaking SD3 to get the best results.
Shopping list
After getting hold of an eDRUMin I began the search for pads and cymbals to build up a full kit:-
- Kick drum
- Pads for toms (at least two; I play “one up, one down”)
- Pad for use as snare drum with support for positional sensing
- Hi-hats, cymbal pads for crashes (at least two) and ride
Since the eDRUMin supports various types of trigger I was able to look for parts from different manufacturers.
Kick start
My first purchase was a partial Jobeky shell pack, for sale locally on Gumtree. It ticked a lot of boxes being close to a full-size acoustic kit including:-
- 20x16 mesh head kick drum
- 12x8 mesh head rack tom
- 14x12 mesh head floor tom
New, this kit would have included an additional 10-inch rack tom and 14-inch snare, but I figured I could buy these individually from Jobeky at a later date if I wanted to. Since the Jobeky dual-zone side mounted triggers are available separately, I could even convert acoustic drums.
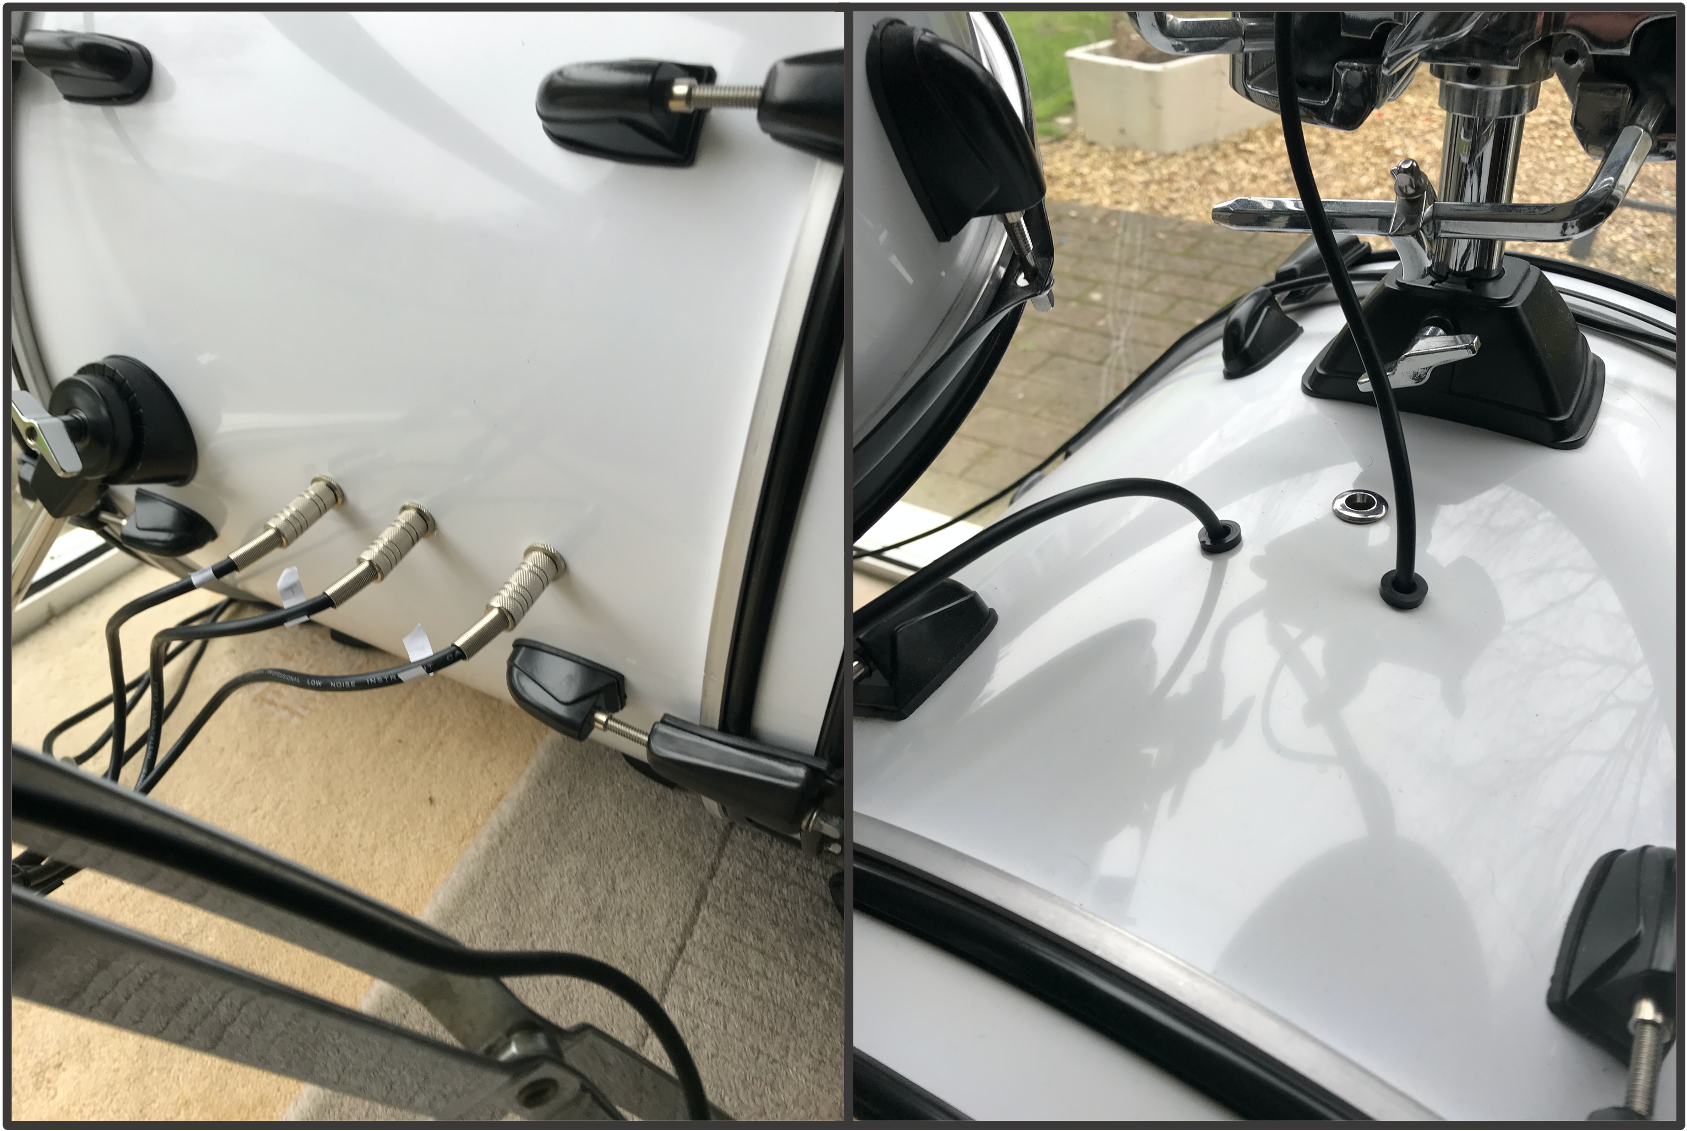
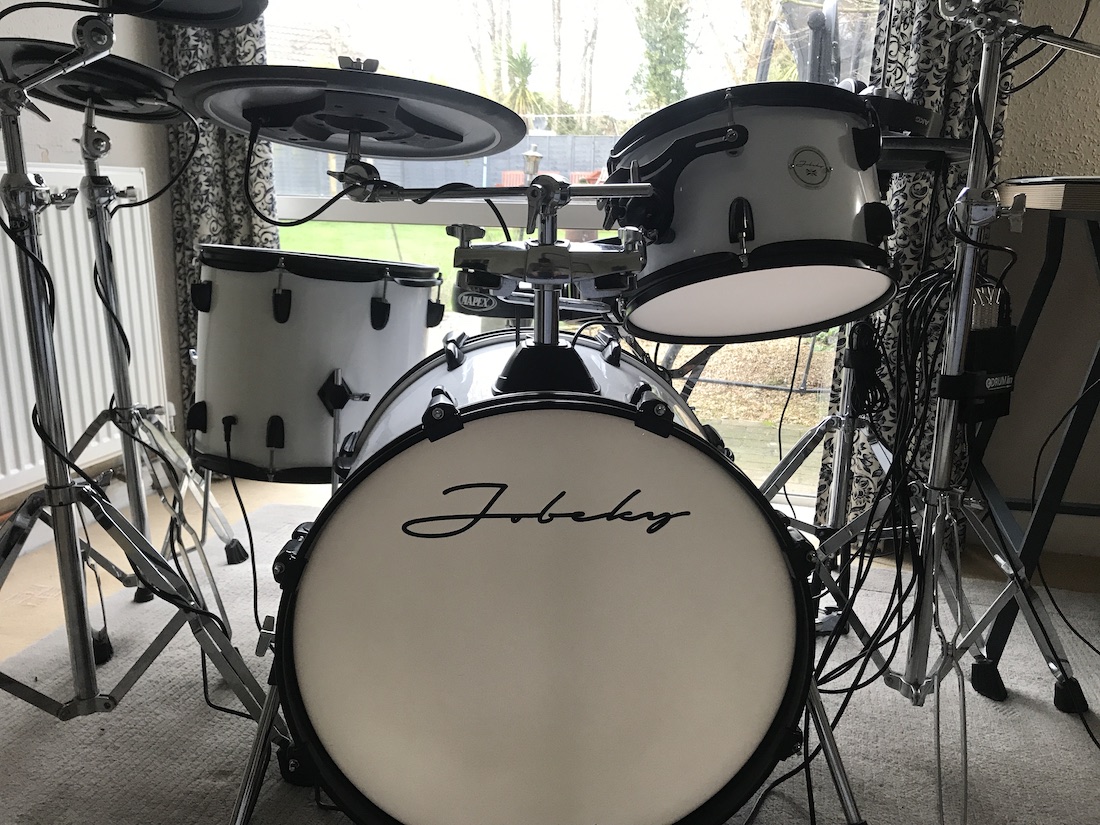
This photo shows the kick drum’s internal cable routing and black fittings, both cost options when purchased new.
Snare drum
I wanted a snare pad suitable for use on a traditional snare stand rather than a tom mount like you find on many electronic pads. My only other requirement was a centre-mounted trigger to enable positional sensing.
First choice was a lovely contrasting Jobeky steel snare in black chrome but the cost and long lead time of 8-10 weeks was too much (everything is custom made to order). Instead, I found a Roland PD-128-S mesh pad for sale on Marketplace in the same black chrome finish. This pad is designed to be used as a snare and the seller threw in a couple of dual-zone cymbal pads to sweeten the deal.
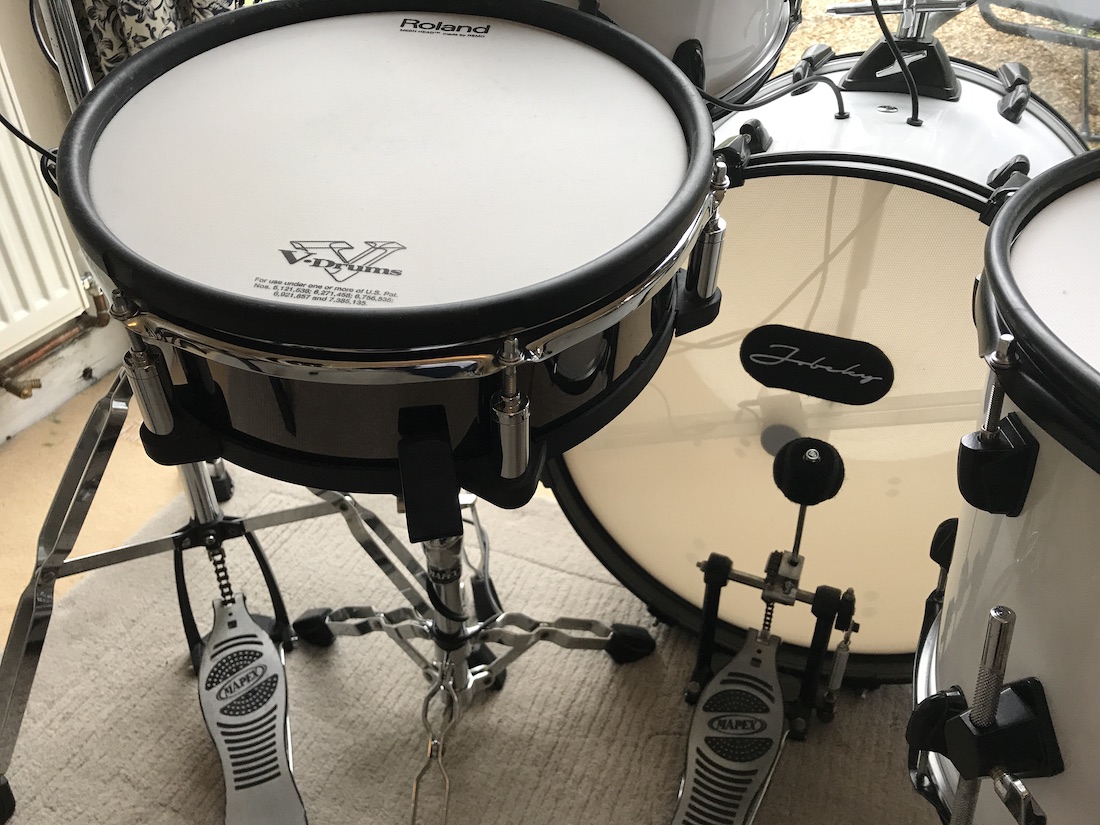
Here is the pad mounted on my snare stand. You can also see the kick drum with centre-mounted trigger and my kick pedal with a Gibraltar ball beater.
Cymbals
I assumed electronic cymbal pads would only be available in rubber. This is true for the mainstream manufacturers (Roland, Yamaha, Alesis, ATV) but there are a number of alternatives available.
Since I was looking at Jobeky products I came across their range of metal cymbals and considered buying a set of “Real Feel” low volume cymbals. Various budget rubber cymbals are available from online shops such as Thomann but I was not 100% confident they would work.
With plenty of options on eBay and I ended up with a pair of used Yamaha cymbals - a 13 inch PCY-130 and matching 15 inch PCY-150. Both are three-zone pads with bell/bow/edge triggers and choke function. The seller threw in a worn Yamaha hi-hat pad as well - more on that in the next section.
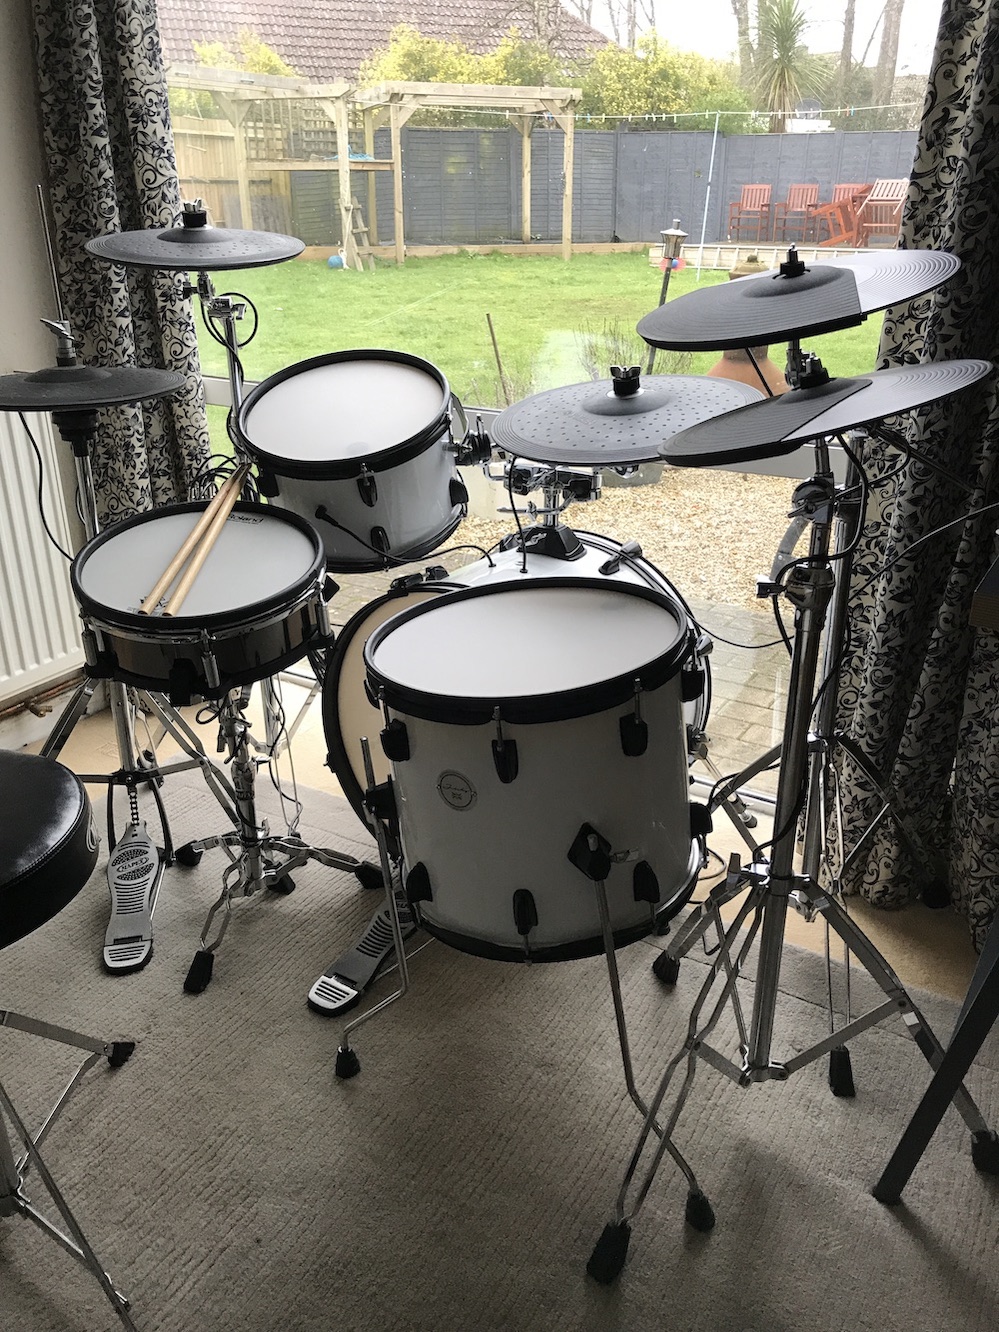
This photo shows all the pads in place and connected:
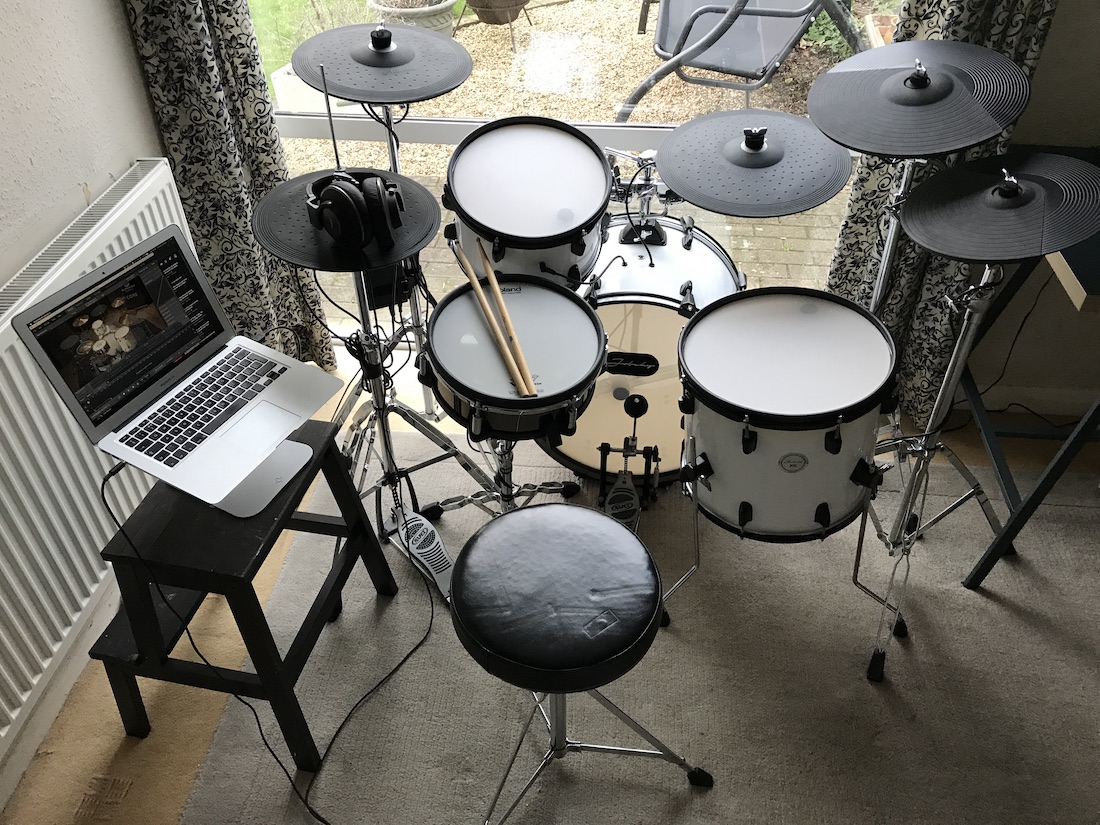
The PCY-150 is used as a ride cymbal on a boom arm attached to the tom mount on the kick drum. The PCY-130 serves as the main crash cymbal on a standard cymbal stand. The other two dual-zone pads which I got for free serve as a second crash and china, or whatever instrument I assign. Although I don’t have the correct mounts they work fine.
Hi-hats
Acoustic hi-hats can make a huge variety of sounds - from tight closed to fully open, played with stick tip or shank on the top or edge of the hi-hat, or played with the foot pedal including heal splashes.
I have play-tested several kits in the past including Roland’s top model and the hi-hats have always been the weak point, so I didn’t have high expectations about what I could achieve on a more modest budget.
There are several ways to try and replicate an acoustic hi-hat using a combination of pad and foot controller:-
- Dedicated foot controller combined with a single cymbal pad
- Cymbal pad mounted on a hi-hat stand combined with a separate hi-hat controller unit
- As (2) but using a pair of pads like acoustic hi-hats
I chose option 2 since I had a (free) dual-zone Yamaha RHH-135 and I wanted to use my existing hi-hat stand. Although the rubber surface has a split it plays fine:
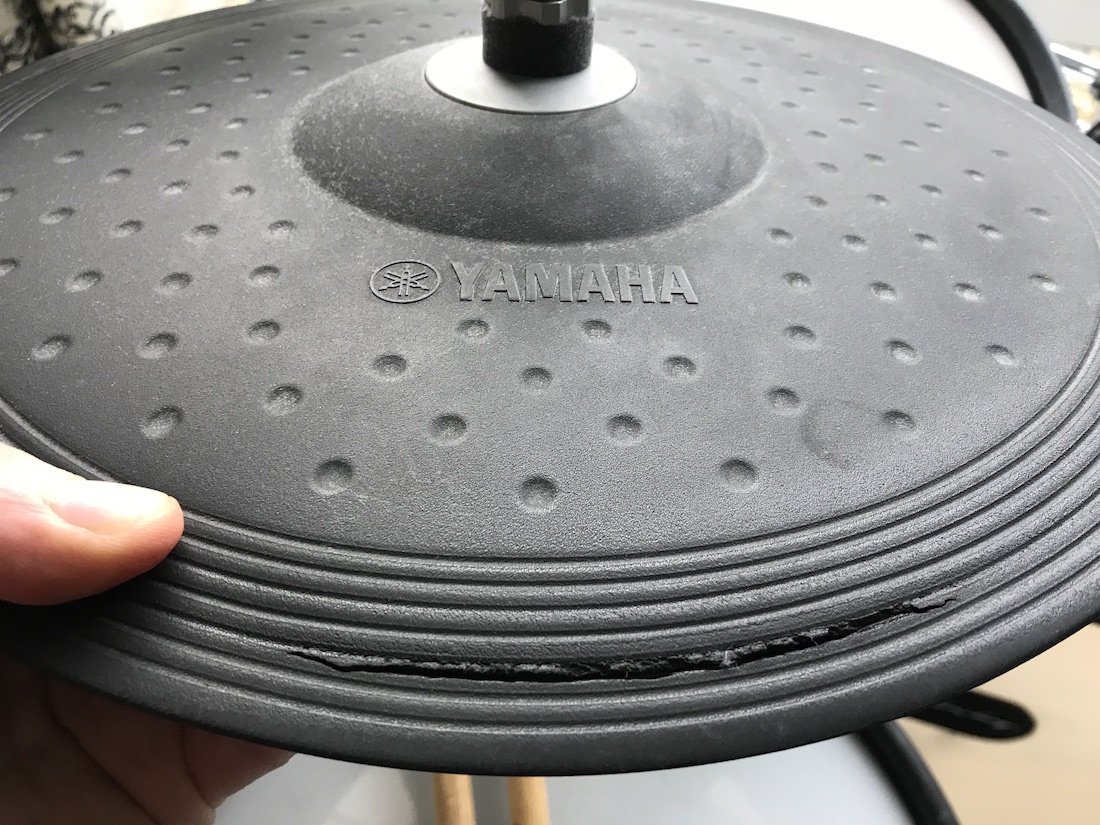
The hi-hat controller is an integrated part of the pad, unlike many other models that use a separate hi-hat controller unit. It also uses a multi-step switch so rather than sending out a range of values (0-127) it outputs five distinct steps with fixed values.
This seemed like a major limitation but results with eDRUMin and SD3 have been great - I will cover this in a future post.
Hi-hat controller options
There are many options for hi-hat controllers so it’s worth a short diversion on this topic.
Roland and others use a hi-hat controller unit that sits on top of the hi-hat stand beneath the hi-hat pad. Pressing the pedal down pushes a sprung part in the hi-hat controller attached to a Force Sensing Resistor (FSR). Here is a photo of a Roland VH-10 hi-hat controller:

As this disassembly of a Roland VH-10 controller shows, this is a very simple mechanism and you wonder how they get away with charging so much!
Hi-hat controller options include:
- FSR controller under hi-hat pad (Roland VH-10)
- Optical controller incorporated in bottom hi-hat (ATV)
- Optical controller under foot pedal Drone Trigger
- FSR(?) controller under foot pedal Magnatrack Remedy HC-2
- Build your own using FSR or Hall Effect sensor DIY options
Completed kit
This shows my initial set-up with the kit facing into the room:
To make better use of space I shifted it around to face out the window:
Finally, here is the eDRUMin mounted to a cymbal stand with the included bracket.:

Hi-hat controller and USB cable connect to ports on the bottom. The device is powered over USB from my laptop but you can use a 9V power supply in situations where no computer is involved. Pads connect to the numbered inputs on the top. There is just enough room for the ten TCS sockets - this device really could not be any smaller!
Cost breakdown
My reference point in terms of budget was intermediate kits such as Roland’s TD-17KVX (RRP £1,599) and ATV EXS-5 (RRP £1,649) and several other options. I was confident I could achieve a better result for considerably less than this.
- Audiofront eDRUMin 10, £265 (new)
- Jobeky kick, rack tom & floor tom, £250 (used)
- Roland PD-128S-BC, £160 (used)
- 14 inch dual-zone cymbal unbranded, £0 (used)
- 12 inch dual-zone cymbal unbranded, £0 (used)
- Yamaha PCY-150 triple zone cymbal, £55 (used)
- Yamaha PCY-135 triple zone cymbal, £35 (used)
- Yamaha RHH-135 hi-hat, £0 (used)
- Superior Drummer 3 - download, £315 (new)
- Gibraltar ball beater, £12 (new)
- TRS stereo cables, £38 (new)
Grand total £1,130 excluding the laptop that is needed to run SD3 (Dec 2020).
I could have reduced the cost by choosing a cheaper alternative to Superior Drummer 3 - after all it has some features I may never use. However, the range and quality of the samples and the dedicated support for e-drums sold it. I was also blown away by the meticulous process used to capture these samples.
Older intermediate Roland kits such as the TD-15KV sell on eBay for around the same price, generally with smaller pads all round and drum modules using technology that is over 10 years old, so I’m really happy with the outcome.
Having spent a total of £90 on cymbals and hi-hats these will probably be upgraded in the future, but in the meantime I am getting in to a regular practice routine. My son is also making good use of the kit for online drum lessons during lockdown.
In future articles I will cover triggering setup using the eDRUMin companion app, and playing with e-drum settings in SD3 to get the best results.
Further reading
- The Digital Drummer’s Swiss Army Knife
- How to Build a DIY Electronic Drum Kit - includes acoustic to electric (a2e) conversion